Import LMS/Assessment Tool Course as Exam in SEB Server
To be able to configure and manage a course or parts of a course existing on a LMS/Assessment Tool as an exam on SEB Server we first need to import an exam from the one of the available courses from a LMS/Assessment Tool that has been setup to use within the SEB Server.
Note
If you don’t have already set up a LMS/Assessment Tool binding within SEB Server and your institution, you have to do this first. More information about setting up a LMS/Assessment Tool binding can be found in the chapter Assessment Tool Setup
You will find the list of available courses provided from all LMS/Assessment Tool that are bound within your institution by going to the “Exam Administration” section on the left hand side and choosing “LMS/Assessment Tool Exam Lookup”. The SEB Server will present you the list of all available courses and you are able to filter and sort the list as usual to find to right course for import.
Note
The “Start-Time” filter is usually set to the date one year before now or to some other default date in the past. The list shows only the courses that has a start-time after that time. If you have long running courses and it may possible that a course has been stated a year or two ago, you have to adapt this “Start-Time” filter to view those courses that has been started before.
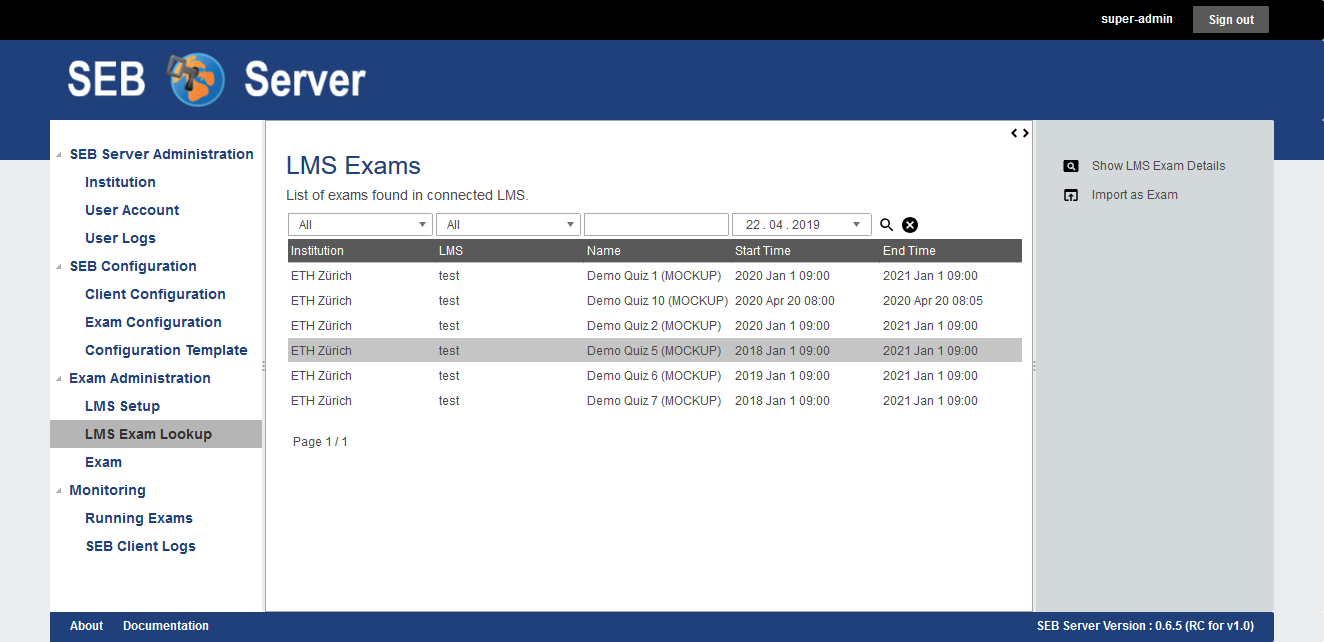
You can view more details of a course by double-click on the specific list entry or by selecting the list entry and click the “Show LMS/Assessment Tool Exam Details” action form the action pane on the right hand side. The application will open a pop-up with available detail information of the course.
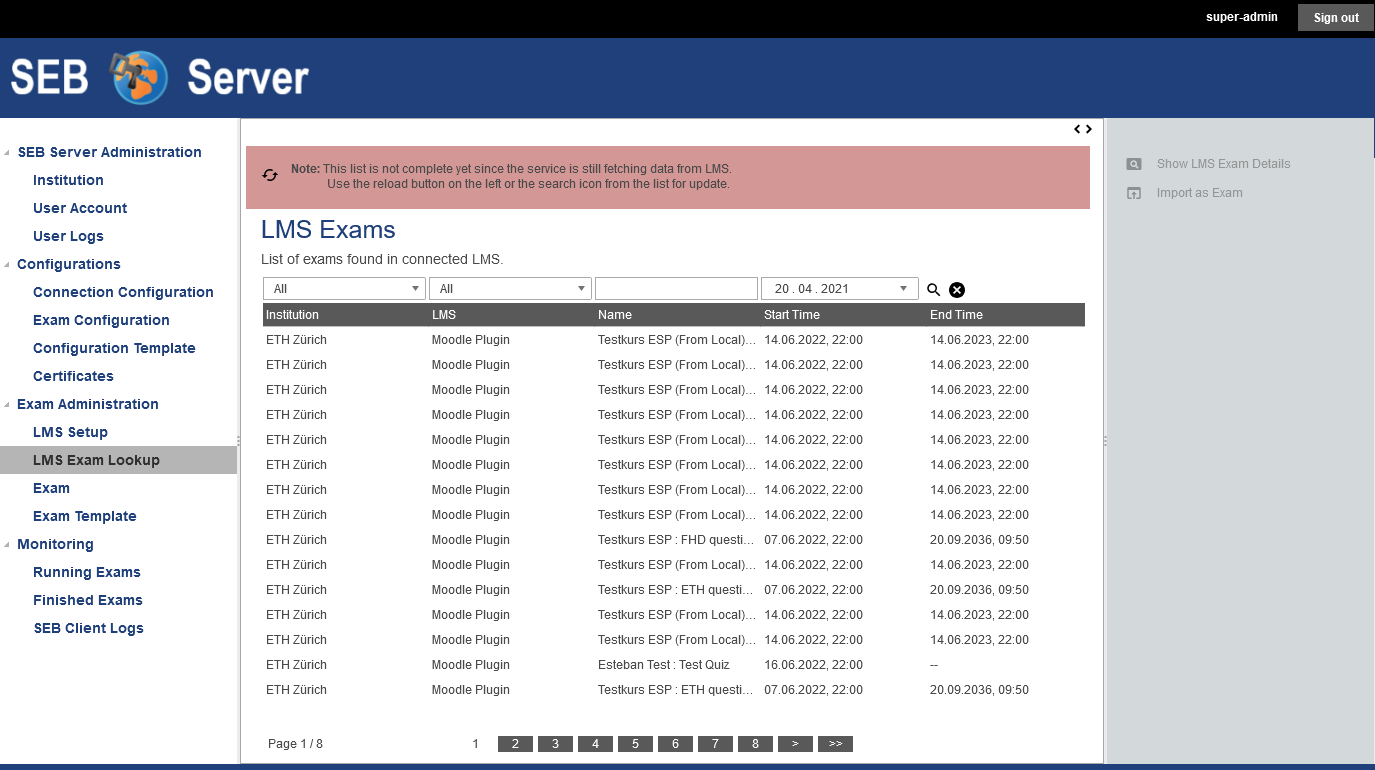
Since SEB Server version 1.5 the data-fetching-process to get all course data from bounded LMS/Assessment Tools works as a background task and the UI request will return anyway no matter if all data has been fetched already and presents the already available data. If the background task is still running and fetching data, SEB Server will indicate that with a message note on top of the page with the ability to reload the page by clicking on the respective icon in the note. With this approach you can now see whether all data are available and fetched or not.
To import a course as an exam find the specific course on the list by using the filter and select the list entry. Use the “Import As Exam” action from the action pane on the right hand side.
Note
If a course has already ended (End-Time passed) it is not possible to import this course and an appropriate message is shown.
On import, the application is creating an exam on SEB Server with a reference to the imported course on the LMS/Assessment Tool. All course specific data like name, description, start-, end-time and course-identifier will not be stored on the SEB Server but always be referenced by the underling course. This means, that the course data has to be modified on the LMS/Assessment Tool side as usual and the SEB Server always takes the actual data from the LMS/Assessment Tool for the course. This has the advantages of the principle of single responsibility and prevents synchronization issues.
You will see the creation page of the new exam with additional information from LMS/Assessment Tool:
Name: Is the name of the course, defines on the LMS/Assessment Tool
LMS/Assessment Tool Setup: Is the name of the LMS/Assessment Tool Setup on the SEB Server from which the course was imported
Start-Time: Is the date and time when the exam is starting. This is defined on the LMS/Assessment Tool
End-Time: Is the date and time when the exam ends. This is defined on the LMS/Assessment Tool
LMS/Assessment Tool Exam Identifier: Is the identity of the course on the LMS/Assessment Tool (external identifier/primary key)
LMS/Assessment Tool Exam URL: Is the start URL of the course/exam
You are now able to either choose an existing Exam Template to initialize the new exam with the settings defined within the template or to set the needed settings only for this exam. If you choose a template, the settings from the template will automatically be added to the exam on creation and you are still able to modify them afterwards.
Initially choose a type for the exam - “Exam Type” - that is currently only used for informational purpose and has no further restrictions or consequences on handling on in SEB Server.
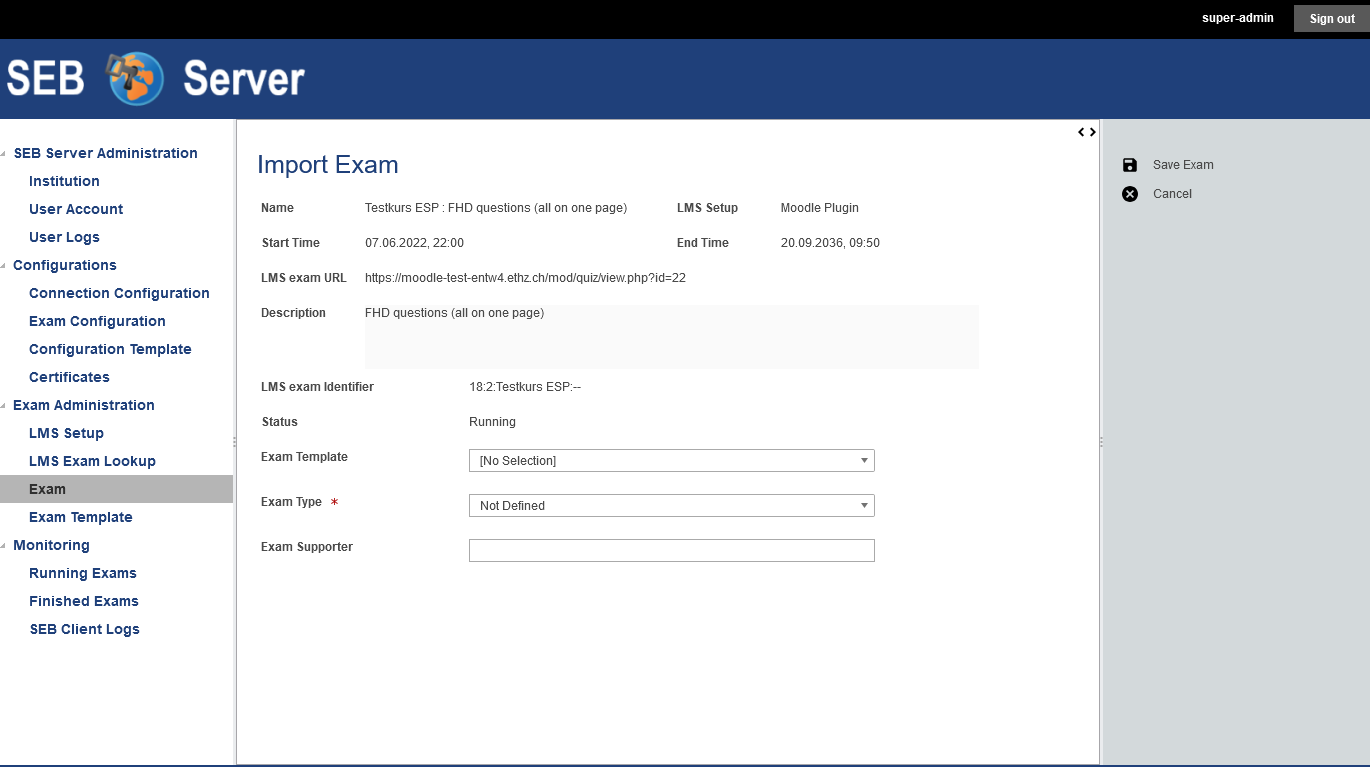
Furthermore you can select and apply all exam supporter that shall be able to see and support this exam while running. To do so, click in the input field of the attribute “Exam Supporter” to see a drop down list of all available users for selection. To filter the drop down list, start typing characters of the name of the user-account you want to apply to automatically filter the list. Click on the drop-down list entry to select the specified user that will be added to the list below the input field. To add another user to the selection just click again into the input field and select another user. To remove a selected user from the selection-list, double-click on the specified entry of the selection-list.
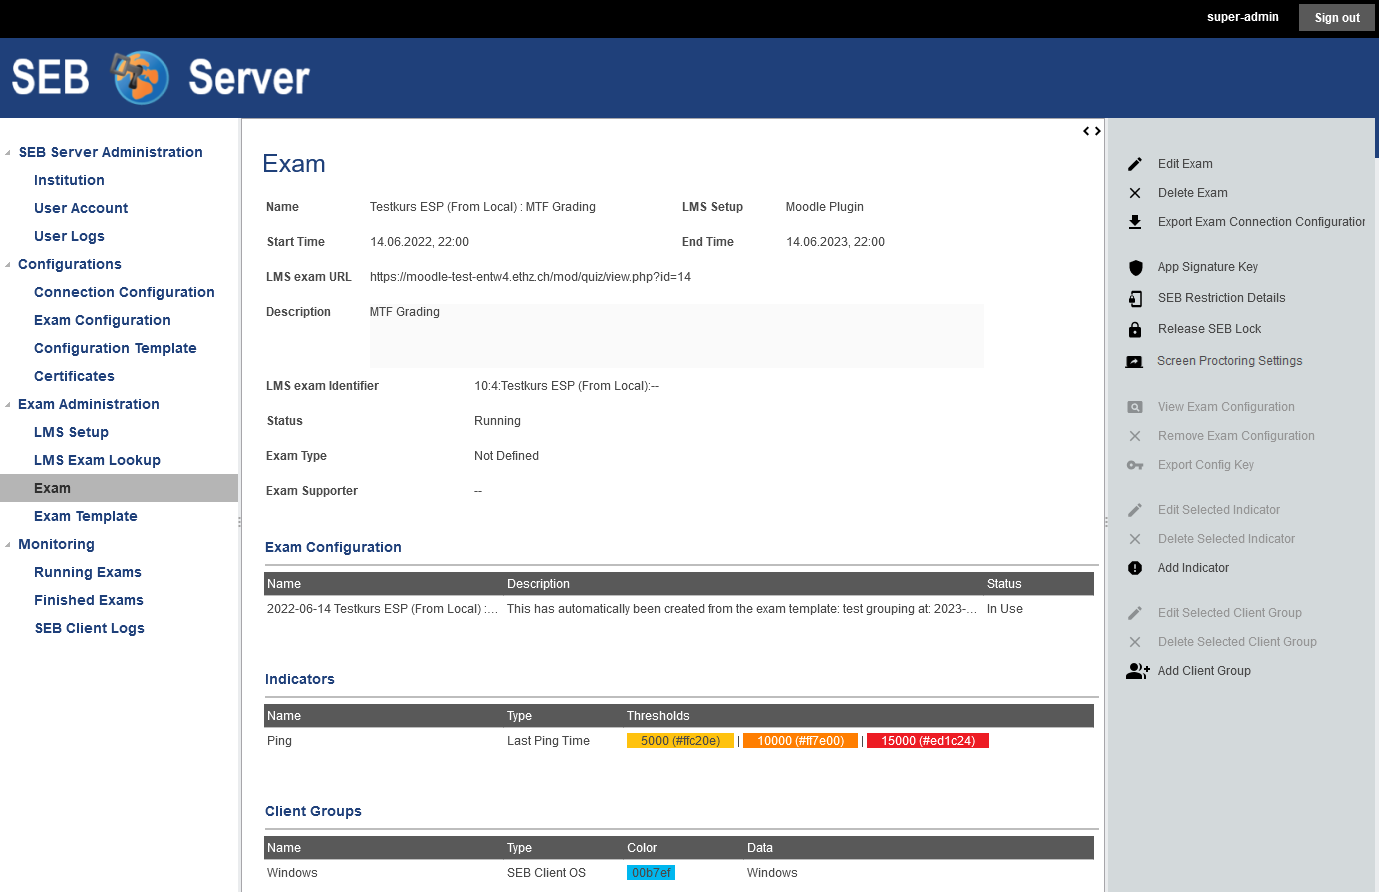
To confirm the import use the “Save Exam” action of the action pane on the right hand side or use “Cancel” if you want to abort the import of the exam and go back to the course list. If you have confirmed and successfully imported the exam, you will see the exam overview page where you are able to edit the details of the exam, apply SEB restrictions of supported by the LMS/Assessment Tool, apply a SEB exam configuration for the exam and define indicators for monitoring the exam later on.
How all this different aspects of the exam are defined and prepared is part of the next chapters.
Use Cases
Import a course as exam
To start setting up a course or quiz form an existing LMS/Assessment Tool as e-assessment with SEB and SEB Server you have to find this course or quiz on the SEB Server and import it as exam. Define a type and apply exam supporter.
Login as an exam administrator and go to the “LMS/Assessment Tool Exam Lookup” page under the “Exam Administration” section.
If you are not sure if the LMS/Assessment Tool that runs your course has already been setup within the SEB Server, go first to the “LMS/Assessment Tool Setup” page and try to find the particular LMS/Assessment Tool in the list. If you can’t find it, please contact an institutional administrator or setup the LMS/Assessment Tool by yourself as described in Assessment Tool Setup.
Find your course or quiz by using the filter of the list and the list navigation as usual.
Double click on the list entries to get all information about a particular course or quiz.
Once you have found the course or quiz, select it on the list and use the “Import Exam” action on the right action pane.
The system will lead you to the exam import page where you see all the details of the course or quiz and where you can set a type and apply exam supporter before importing.
Choose a type for the imported exam in the “Exam Type” selection. The type of an exam is currently just informative hand will cause no restriction for the imported exam.
Select as many exam supporter as you want to be able to support the running exam. Read above, how to find and select exam supporter with the drop down multi selection.
When all is properly set, use the “Save Exam” action on the right action pane to save the exam and complete the task.